스프링 프레임워크 회원가입 구현 예제 1
https://hdhdeveloper.tistory.com/16
[SpringFramework] 스프링프레임워크 회원가입 기능 구현 예제_1
Spring에서 회원가입 예제 2편 https://hdhdeveloper.tistory.com/17 [SpringFramework] db 연동 후 회원가입 로직 작성하기_2 지난 번, mysql 연동까지 진행했고 이 페이지에서는 회원가입 폼 작성 및 db 연동 작..
hdhdeveloper.tistory.com
스프링 프레임워크 회원가입 구현 예제 2
https://hdhdeveloper.tistory.com/17
[SpringFramework] db 연동 후 회원가입 로직 작성하기_2
지난 번, mysql 연동까지 진행했고 이 페이지에서는 회원가입 폼 작성 및 db 연동 작업을 진행하겠다. 먼저 프레임워크에서 프로젝트를 생성하게 되면, 기본적으로 homeController.class와 home.jsp 파일이
hdhdeveloper.tistory.com
이전 포스팅에서 ajax를 호출하는 것까지 작성을 했다.
ajax의 url 에 적힌 경로를 호출하게 되는데 어제 작성한 script 페이지를 다시 보겠다
|
1
2
3
4
5
6
7
8
9
10
11
12
13
14
15
16
17
18
19
20
21
22
23
24
|
<script type="text/javascript">
function fn_join_modal(){
$('#JoinModal').modal("show");
}
function fn_login_modal(){
$('#LoginModal').modal("show");
}
/*회원 등록 버튼*/
$("#join_submit").click(function(){
$.ajax({
type: "post",
url : "/join/reg_proc.ajax",
dataType : "json",
data : $(".reg_form").serialize(),
success:function(data){
alert("등록처리 되었습니다.");
},
// error:function(jqXHR, textStatus, errorThrown){
// alert("사용자 등록 도중 오류 발생했습니다."+textStatus);
// }
})
});
</script>
|
cs |
"/join/reg_proc.ajax" 라는 경로를 매핑하고 있는 컨트롤러로 data를 가지고 요청을 하게 된다.
data에 적혀있는 $(".reg_form").serialize()은 지난 포스팅에 설명해둔 것이 있다.
모르겠으면 참고하면 좋을 듯하다.
[JAVASCRIPT] 필요한 값만 추출하여 FORM 구조 만들기
AJAX를 사용하여 비동기 통신을 할 때, 일일히 데이터를 하나씩 명시해주는 것이 불편하여 데이터를 serialize 할 수 있도록, FORM 구조를 만들어서 데이터를 전송하려고 공통 자바스크립트 페이지에
hdhdeveloper.tistory.com
해당 요청을 보면,
flag라는 변수를 이용해 등록,삭제,수정을 모두 "/join/reg_proc.ajax" 요청으로 받고있다
flag의 값을 jsp 페이지 설정해주어 컨트롤러로 넘겨주게 되면,
flag의 값을 기준으로 분기가 되는 구조이다
@RequestParam 어노테이션을 사용했기 때문에,
flag에 빈 값이 들어오게 되면 오류를 발생시킨다. (필수 값이라는 말)
switch문에서 각각 처리가 종료되고 나면 PrintWriter를 이용해서 result값을 다시 View 페이지에 전달해준다
해당 result 값을 가지고 정상적으로 업무가 종료되었는지 파악할 수 있다
|
1
2
3
4
5
6
7
8
9
10
11
12
13
14
15
16
17
18
19
20
21
22
23
|
@RequestMapping(value="/join/reg_proc.ajax", method = RequestMethod.POST)
public void reg_proc(HttpServletRequest req, HttpServletResponse resp, @RequestParam String flag, @ModelAttribute("userVO") UserVO userVO, ModelMap modelMap) throws IOException {
boolean result = false;
switch(flag) {
case "add" :
mainService.addUser(userVO);
result = true;
break;
case "delete" :
mainService.deleteUser(userVO.getUser_id(),userVO.getUser_pw());
result = true;
break;
case "update" :
// mainService.updateUser();
result = true;
break;
}
PrintWriter writer = resp.getWriter();
resp.setCharacterEncoding("UTF-8");
resp.setContentType("text/html;charset=UTF-8");
writer.println(result);
}
|
cs |
우리가 해야할 일은 flag 가 add 일 때다
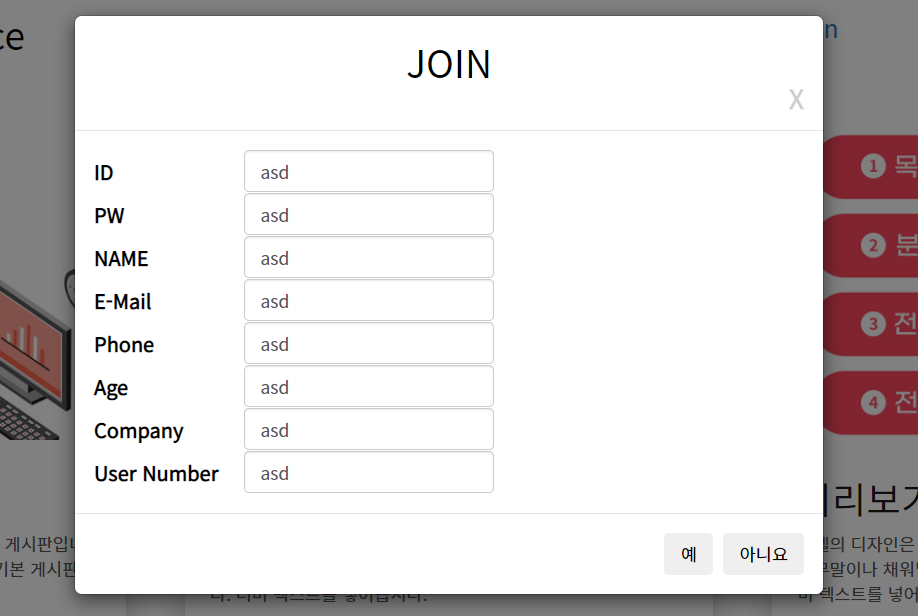
회원가입 페이지에서 [예] 버튼을 누르게 되면 case add : 구문으로 들어오게 되는데,
여기서 mainService 인터페이스의 addUser메소드를 호출하도록 구현되어있다
요청 파라미터로는 userVO를 설정했다
밑의 소스는 UserVO이다
필요한 항목들을 정의해서 객체를 생성해놓았다
나중에 데이터베이스에 Insert 처리를 할 때, UserVO에 있는 항목들이 입력되게 된다
|
1
2
3
4
5
6
7
8
9
10
11
12
13
14
15
16
17
18
19
20
21
22
23
24
25
26
27
28
29
30
31
32
33
34
35
36
37
38
39
40
41
42
43
44
45
46
47
48
49
50
51
52
53
54
55
56
57
58
59
60
61
62
63
64
65
66
67
68
69
70
71
72
73
74
75
|
package main.com.basic.vo;
public class UserVO {
private String user_id;
private String user_pw;
private String user_name;
private String user_email;
private String user_phone;
private String user_age;
private String user_company;
private String user_no;
private String delete_at;
public String getDelete_at() {
return delete_at;
}
public void setDelete_at(String delete_at) {
this.delete_at = delete_at;
}
public String getUser_id() {
return user_id;
}
public void setUser_id(String user_id) {
this.user_id = user_id;
}
public String getUser_pw() {
return user_pw;
}
public void setUser_pw(String user_pw) {
this.user_pw = user_pw;
}
public String getUser_name() {
return user_name;
}
public void setUser_name(String user_name) {
this.user_name = user_name;
}
public String getUser_email() {
return user_email;
}
public void setUser_email(String user_email) {
this.user_email = user_email;
}
public String getUser_phone() {
return user_phone;
}
public void setUser_phone(String user_phone) {
this.user_phone = user_phone;
}
public String getUser_age() {
return user_age;
}
public void setUser_age(String user_age) {
this.user_age = user_age;
}
public String getUser_company() {
return user_company;
}
public void setUser_company(String user_company) {
this.user_company = user_company;
}
public String getUser_no() {
return user_no;
}
public void setUser_no(String user_no) {
this.user_no = user_no;
}
public String toString() {
return "user_id "+user_id+"user_name "+user_name+"user_email "+user_email+"user_phone"+user_phone+"user_age"+user_age+"user_company "+user_company+"user_no "+user_no ;
}
}
|
cs |
MainService
MainService는 Interface 구현체로 MainServiceImpl을 정의해서 해당 서비스를 상속받아 사용하게 된다.
우리가 사용해야 할 것은 addUser이다.
|
1
2
3
4
5
6
7
8
9
10
11
12
13
14
15
16
17
18
|
package main.com.basic.service;
import java.util.List;
import main.com.basic.vo.UserVO;
public interface MainService {
public List<UserVO> findUserList();
public UserVO findUser(String id);
public void addUser(UserVO vo);
public void deleteUser(String user_id, String user_pw);
}
|
cs |
MainServiceImpl
이 클래스는 @Service 라는 어노테이션이 붙어있다.
서비스라는 어노테이션을 붙여줌으로써 해당 클래스에서 Service 처리 작업이 이루어진다고 알리고 있다.
그리고 @Resource를 이용하여 DAO 인 MainMapper를 주입 받아서 사용하고 있다.
VO안에 있는 delete_at 항목을 0으로 설정한 이유는 해당 항목은 삭제 여부를 알기 위해 VO에 입력해놓았다.
여기서도 DAO인 MainMapper 안에 있는 addUser 메소드를 호출한다.
|
1
2
3
4
5
6
7
8
9
10
11
12
13
14
15
16
17
18
19
20
21
22
23
24
25
|
@Service
public class MainServiceImpl implements MainService {
@Resource
MainMapper mainMapper;
@Override
public List<UserVO> findUserList() {
try {
return mainMapper.findUserList();
} catch (SQLException e) {
throw new RuntimeException("사용자 조회 도중 오류 발생"+e);
}
}
@Override
public void addUser(UserVO vo) {
try {
vo.setDelete_at("0");
mainMapper.addUser(vo);
} catch (SQLException e) {
throw new RuntimeException("회원 등록 중 오류가 발생했습니다.");
}
}
|
cs |
MainMapper
|
1
2
3
4
5
6
7
8
9
10
11
12
13
14
15
16
|
package main.com.basic.dao;
import java.sql.SQLException;
import java.util.List;
import org.apache.ibatis.annotations.Mapper;
import main.com.basic.vo.UserVO;
@Mapper
public interface MainMapper {
public List<UserVO> findUserList()throws SQLException;
public void addUser(UserVO vo)throws SQLException;
}
|
cs |
MainMapper 인터페이스에도 마찬가지로 @Mapper를 입력하여 선언해준다
해당 DAO를 통해 우리는 실제로 데이터베이스에 Insert 작업을 하는 MainMapper.xml 파일을 읽는다
우리는 이전에 스프링 환경설정을 통해 bean 설정을 하여 mapperLocation을 설정해준 적이 있다
설정이 되어있지 않다면 root-context.xml에 해당 코드를 삽입하자
|
1
2
3
4
|
<bean id="sqlSessionFactory" class="org.mybatis.spring.SqlSessionFactoryBean">
<property name="dataSource" ref="dataSource" />
<property name="mapperLocations" value="classpath*:/mappers/*.xml" />
</bean>
|
cs |
해당 mapperLocations에 설정되어있는 매퍼 위치는 다음과 같다

MainMapper.xml
|
1
2
3
4
5
6
7
8
9
10
11
12
13
14
15
16
17
18
19
|
<?xml version="1.0" encoding="UTF-8"?>
<!DOCTYPE mapper
PUBLIC "-//mybatis.org//DTD Mapper 3.0//EN"
"http://mybatis.org/dtd/mybatis-3-mapper.dtd">
<mapper namespace="main.com.basic.dao.MainMapper">
<select id="findUserList" resultType="main.com.basic.vo.UserVO">
select * from TB_USER
</select>
<select id="findUser" resultType="main.com.basic.vo.UserVO">
select * from TB_USER where user_id=#{id}
</select>
<insert id="addUser">
insert into TB_USER(user_id,creat_dt,user_pw,user_name,user_email,user_phone,user_age,user_company,user_no,delete_at)
values(#{user_id},SYSDATE(),#{user_pw},#{user_name},#{user_email},#{user_phone},#{user_age},#{user_company},#{user_no},#{delete_at})
</insert>
|
cs |
여기 mapper 태그의 namespace 속성을 보면 @Mapper 가 명시되어있던
MainMapper.java 파일의 경로가 적혀진 것을 볼 수 있다
addUser 아이디를 가지고 있는 insert 태그를 보면 resultType이 없는데,
addUser메소드는 void로 선언되어있기 때문에
return 받을 데이터가 없다
다음은 회원가입의 결과이다.


'개발 > BACK' 카테고리의 다른 글
| [SpringFramework] 스프링프레임워크 게시판 구현 예제_1 (0) | 2021.03.16 |
|---|---|
| [SpringFramework] 스프링 프레임워크 로그인 (Login) 기능 예제 (0) | 2021.03.16 |
| [SpringFramework] 스프링프레임워크 회원가입 기능 구현 예제_2 (0) | 2021.03.16 |
| [SpringFramework] 스프링프레임워크 회원가입 기능 구현 예제_1 (0) | 2021.03.15 |
| [Spring Framework ] jdk 1.8 변경 방법 및 Spring Framework 버전 변경 방법 (+추가 , MVNREPOSITORY 사용방법) (0) | 2021.03.15 |


